Museum • The House • Kitchen - Part 1
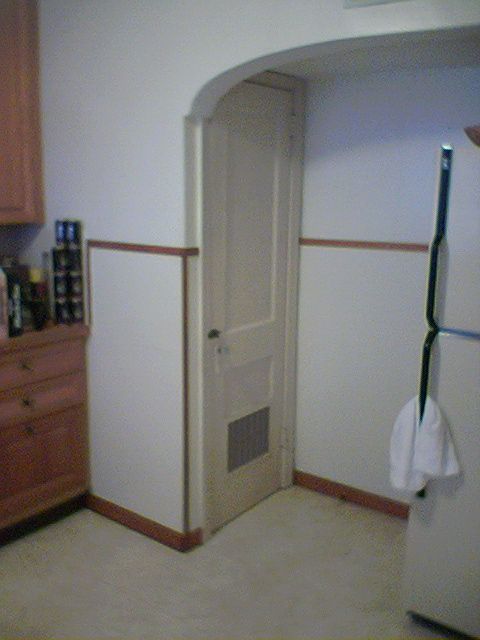
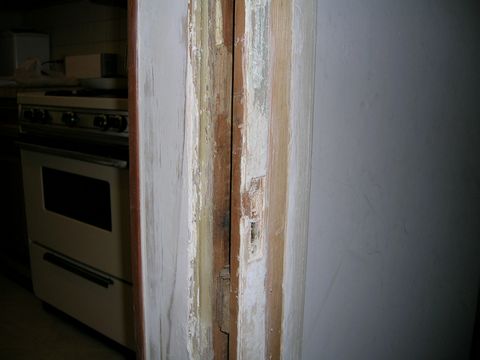
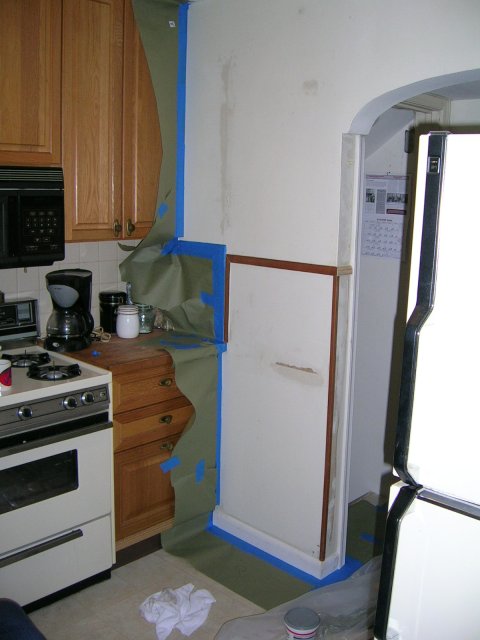
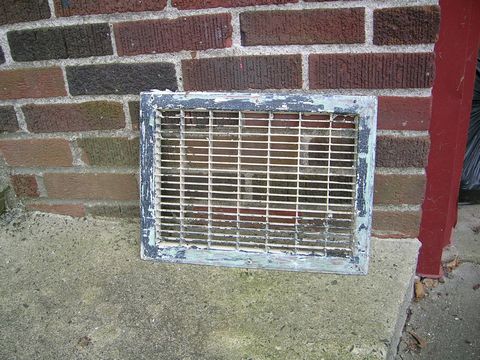
I didn't take enough and good enough "before" pictures to really show the problems with this door. The picture is grainy because I took it with the crummy camera built in to my PDA. What it doesn't show is the horrible crack in the upper left rail. That crack was simply painted over, leaving about a 1/8" rise. The hinge screws had been over-torqued at some point, so they had no bite and the door sagged making it necessary to lift the door a bit to make it close. The bottom part of the lower panel was chopped out in order to install the return-air grille (the room beyond is the utility room, with washer, dryer, stationary tubs, and the furnace/AC). Also not visible in this picture is a poorly patched crack in the kitchen wall to the left of the door. The kitchen at one time was papered half-up, about the level of the trim pieces you see at the level where a chair-rail might be appropriate. Flat wood panels had been installed to cover up that paper (and who knows what else!). This rail, the corner mouldings, and the floor mouldings are the only natural-colored wood trim in the whole house.
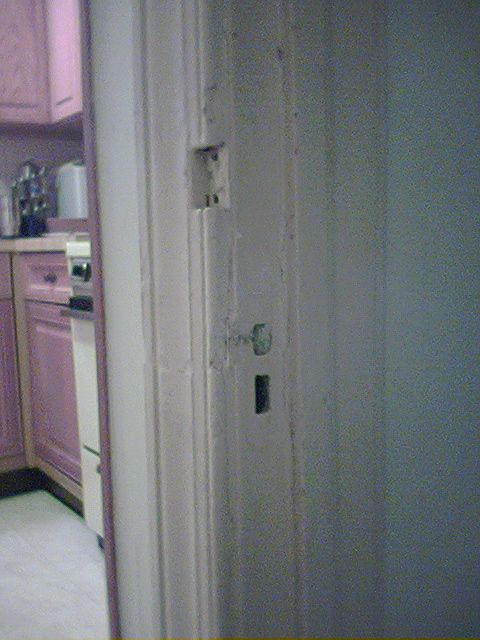
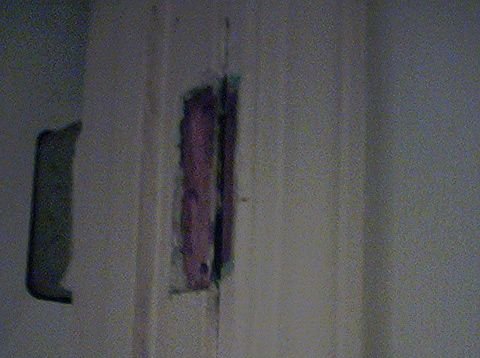
The kitchen had a cheap slide-bolt, which is exceptionally silly for several reasons. First, this is a simple passage to the utility room and on to the basement - no real need to secure this door. Even so, the mortise lockset in that door includes a skeleton-key deadbolt which is ultimately stronger than the tiny screws that come with these slide-bolts. The gap at the top is where the receiver for the bolt mounted, below you can see that the strike plate was repeatedly painted over. In this house all of the hardware -- hinges, trim plates, faces of the locksets, and strike plates -- have multiple layers of paint over them. Here, I had to strip off several layers of paint just to verify that there really was a strike plate and not just some holes in the wood. In other places knobs and plates have been painted black in a misguided attempt to create a pleasing contrast. You can also see how battered the casing is - I'd need to replace it even if that bolt-hole hadn't been hacked into it. Also visible are the cracks in all the layers of paint near the stop moulding.
Another fuzzy picture from the PDA camera. This was meant to show how the hinge screw holes had been torn out. I drilled out the screw holes and glued and hammered in pieces of dowel so I can drill new pilot holes and give the screws plenty of wood to "bite".
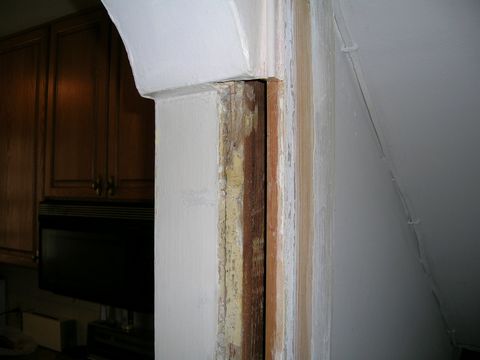
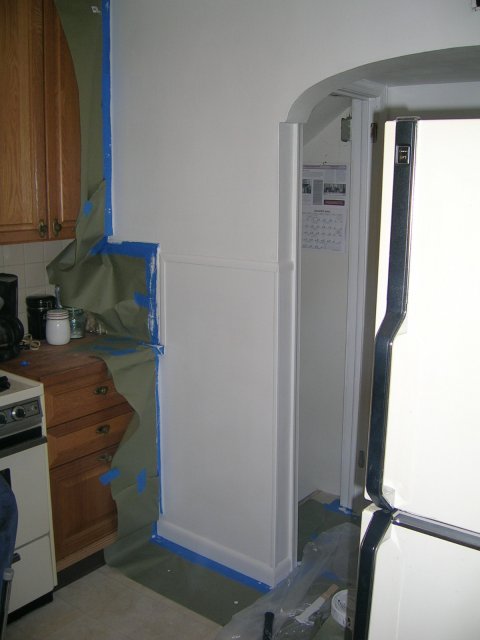
Working in the kitchen, getting ready for when I want to bring that door back in. Tried stripping the frame and mouldings, but finally decided that I need to replace at least part of the casing and stop. Pulled them off, and continued stripping. At the top of the door there's a bit of a complication due to the narrow passage. Cut the casing here, and I'll have to match up the new casing and do some fine hand-shaping to hide the seam.
In the process of removing the casing I did a bit of damage to that cheap panel I mentioned in the first before picture. I'm smoothing that with putty, you can also see I've removed the old strike-plate and am still in the process of stripping and cleaning the rest of the frame.
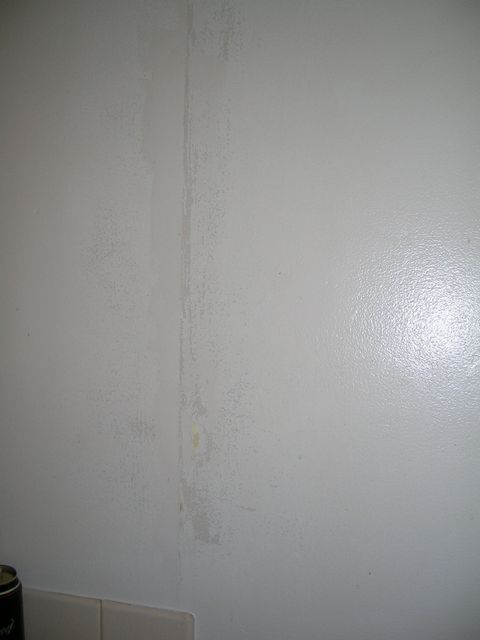
Back inside -- remember that crack I told you you couldn't see in the first before picture? Well, here it is after I sanded down most of the rise, a couple of thin layers of spackle and some more sanding. You can't see the green, but there's a spot where you can see where someone thought yellow was a nice color for the kitchen. The bright reflection from the flash shows you something else I'll have to deal with -- the last time the kitchen was painted they used a glossy finish. I'm sanding as I move along and patch the surface imperfections I find. A complication is that this house is old enough that the walls are laid-up plaster, not drywall. As a result, there is a fair amount of natural texture. There's no way I'm going to sand the walls down to baby's-butt smooth, and I'd rather not anyway as I like the texture of layup plaster. The problem is that I need to do some deglossing to make sure the new finish coat sticks. The result of not paying enough attention to that is apparent in the peeling areas in my dining and living rooms. The current plan is to sand everywhere enough to rough it up a bit, then clean with TSP which also tends to have a deglossing effect, then a primer coat before the finish coat.

I've replaced all of the moldings except for the stop. The casing had to be thrown out, but it turns out that the old casing was 2-3/4" wide - and the nearest match available is 2-1/4" wide. To accomodate this I needed to build up some plaster to fill the 1/2" gap. Also, the molding at the top of the panel and the base molding had to be replaced with similar pieces 1/2" longer. Most of these were purchased pre-primed since I'd already decided I'm painting the trim rather than keeping the stain.
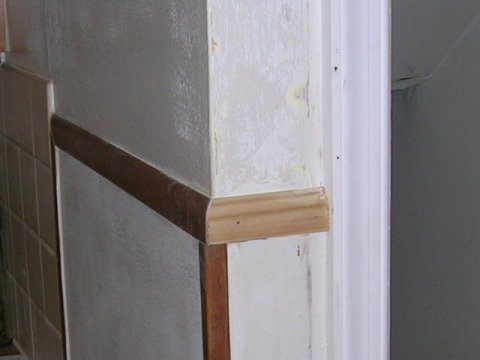
This is the top molding. It wasn't difficult at all to cut a matching piece for the outside corner to the casing.
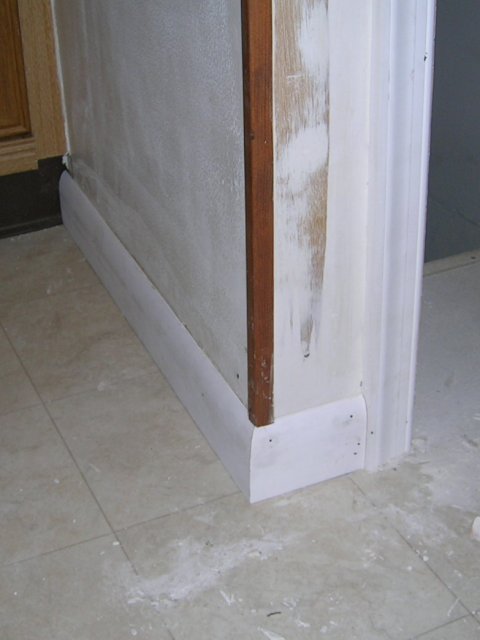
This is the bottom - and again I should have taken a better "before" picture. I never liked the way the corner was originally done. The corner molding extended all the way to the floor, and the base moldings were square-cut. With some designs that probably would work, but in this case the cut sides of the base moldings are thicker than the corner molding, I always thought it looked terrible. Here I've made a correct outside corner.
I've masked off part of the kitchen in preparation to begin the primer coat.
After the first coat of primer - actually, it's not going to look a whole lot different after the color coats.
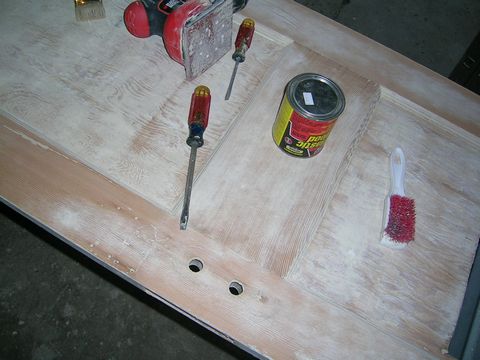
The door and several of my tools during the stripping process. I used about a half gallon of stripper trying to get the old paint off. Fairly early on I could tell that the wood was not of good enough quality for me to go with a natural wood look with stain and varnish -- I'll be painting all of the woodwork. You can see the can of putty I needed to fill some of the scars in the wood, and the sander that is going to get a heck of a workout before I'm through.
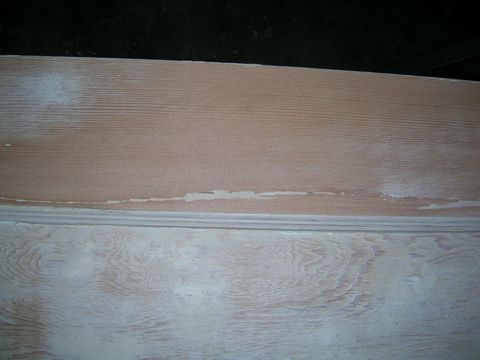
I don't have a decent "before" picture of the crack in the door. This is after I stripped away 60 years of paint, injected some wood glue into the crack and pressed it back together, sanded down the rise, filled the remaining gap with putty, and sanded the filler flush. Visible here is also the reason why I can't go to a natural finish. Not only is the door covered with spots of putty fixing defects like this, the panels are not proper raised panels. The rails are decent wood, but the panels appear to be sheets of cheap 3/16" plywood. This is typical of all of the interior doors -- although all of the entry doors appear to have decent quality raised panels, the interior doors have this coarse-grained fir plywood.

After several weekends of stripping, sanding, filling, sanding, cursing, sanding....I finally applied some primer/sealer to the door. I have also re-installed the brace that was used to mount the return air grille. Need to work a bit on my brush technique, the first coat of primer had some heavy brush marks which I have sanded out. Chalk that up to learning curve.
The air return grille taken out of the door, and several attempts to strip multiple layers of paint prior to repainting. See the hideous green that the kitchen had been painted once? It's not the only time I saw that color. Every time I see it I keep thinking, "It could have been worse...".
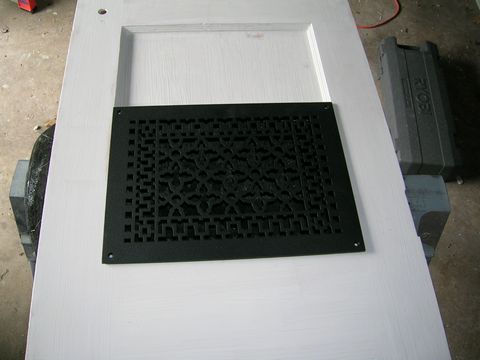
First test fitting of the black powder-coated cast aluminum return air grille I purchased rather than waste any more time trying to salvage the old grille. Don't ask how much I paid for it, just tell me it looks really-really-really good. As I've thought more about colors, I'm planning to match the rails to the trim color and match the panels to the wall color. If it sucks, it's not that much trouble to repaint the panels to the trim color. I'll keep this grille in the flat black powder-coat, and I hope to paint the other kitchen register to match. If that's nasty, I'll buy a new kitchen register and decide I like the plain white color it comes in. I'm also hoping to find a way to attach some black filter-cloth behind this grille, partly to trap some dust on the way back to the furnace, but mostly to keep the view through this grille blacked out.
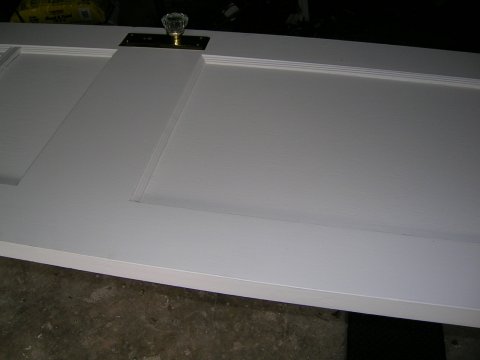
It's hard to believe, but actually this door is two different colors. The panels are the wall color - "Powdered Snow"; The rails are the trim color - "Swiss Coffee". It's all white to me...
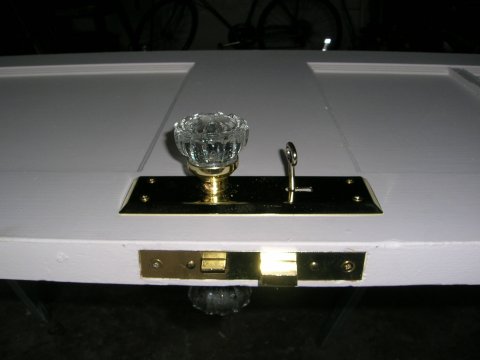
I've installed the new lockset in the door. The bolt is extended, skeleton key in the keyhole - everything works!
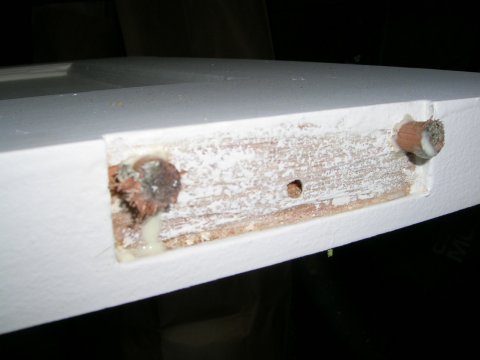
Since I didn't do a good job of illustrating how I fix worn-out screw-holes in the door frame, here I'm doing the same thing in the door itself.
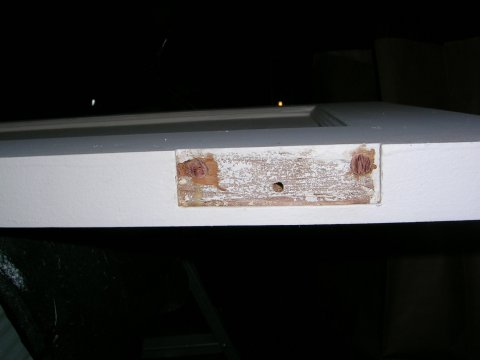
Those same pegs after being cut down and sanded flush (I'm getting a lot of use out of the Dremel MotoTool).

A new hinge, firmly mounted on the door, thanks to those new pegs!
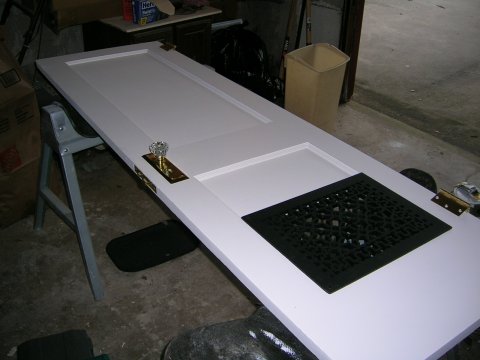
The door is now complete - painted and with all new hardware installed. Now I just need a repainted kitchen to mount it in.
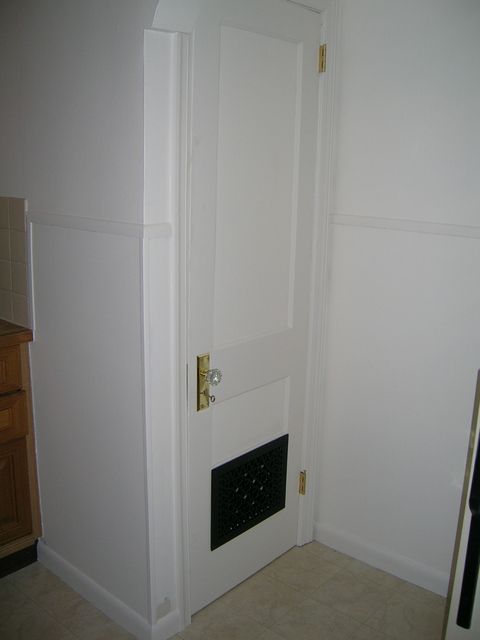
I've remounted the door. There's a little touch-up painting to be done, some staining from handling the door and a spot where I damaged the new paint before it had set. Still need to install the strike and the stop, but you can't see that with the door closed.
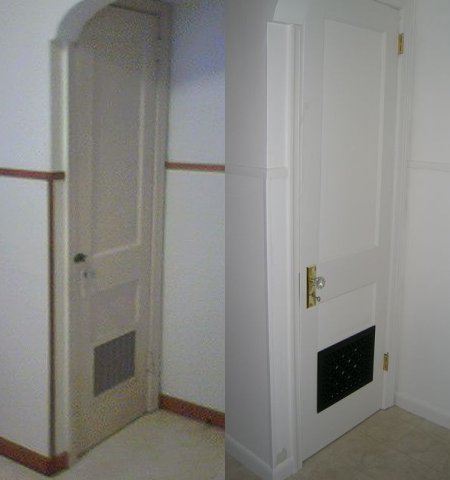
Just to compare, it's a shame I didn't take a better quality "before" picture...